

f 14.0
1/1000
ISO 6400
85mm lens
10/1/17 1:54 pm

BYUI School Blog

During the excursion at Bannack Ghost town, there were many unique items that gave the town a lot of character. For my fine art assignment, I chose to capture random objects to try and help convey the mysterious feel the town gives.

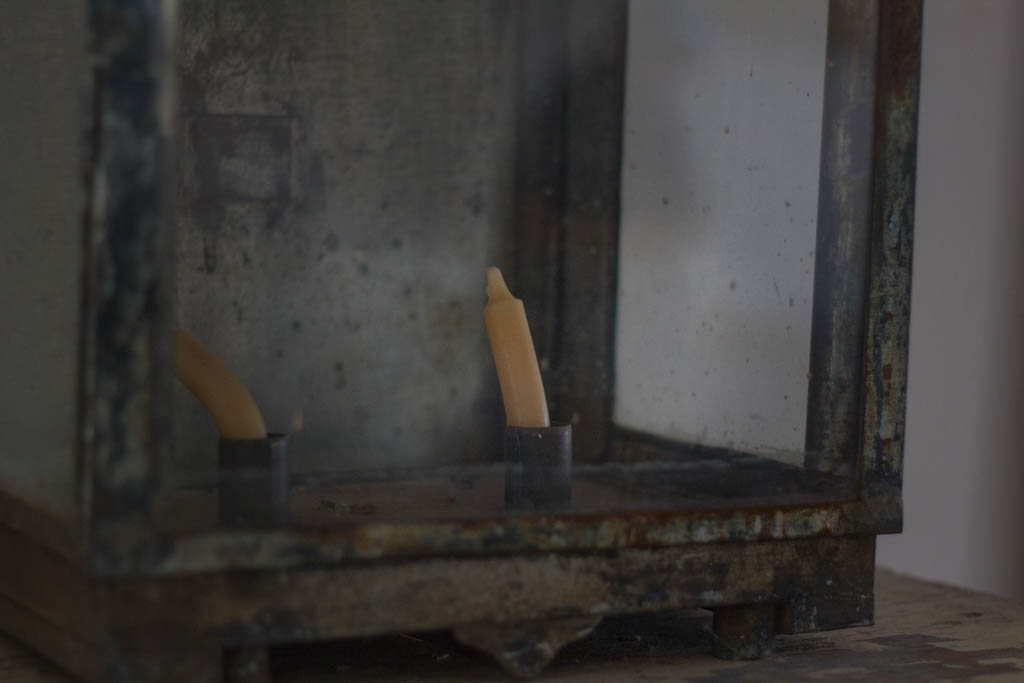
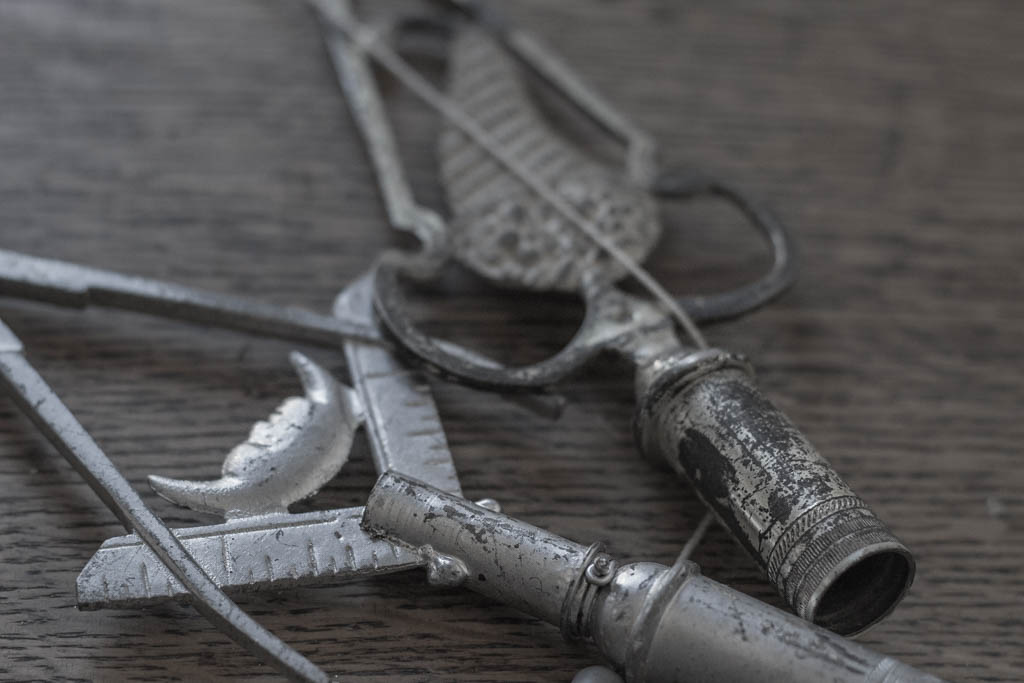

During post production, I edited the pictures the same way: sharpening the focal point and adding burn effect to the edges of the image. The image of the quill covers I chose to make monotone.
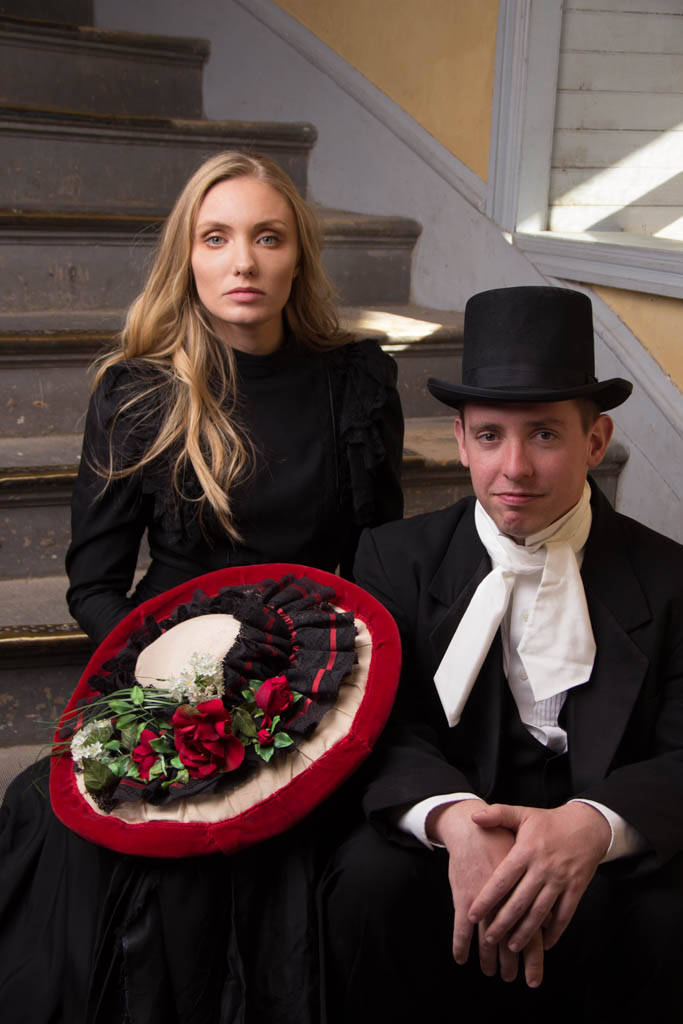
During the group time, I was able to capture my creative shots. My group decided to go to the Hotel Meade to take our pictures, because we thought this building would provide great lighting, and backgrounds for our compositions.
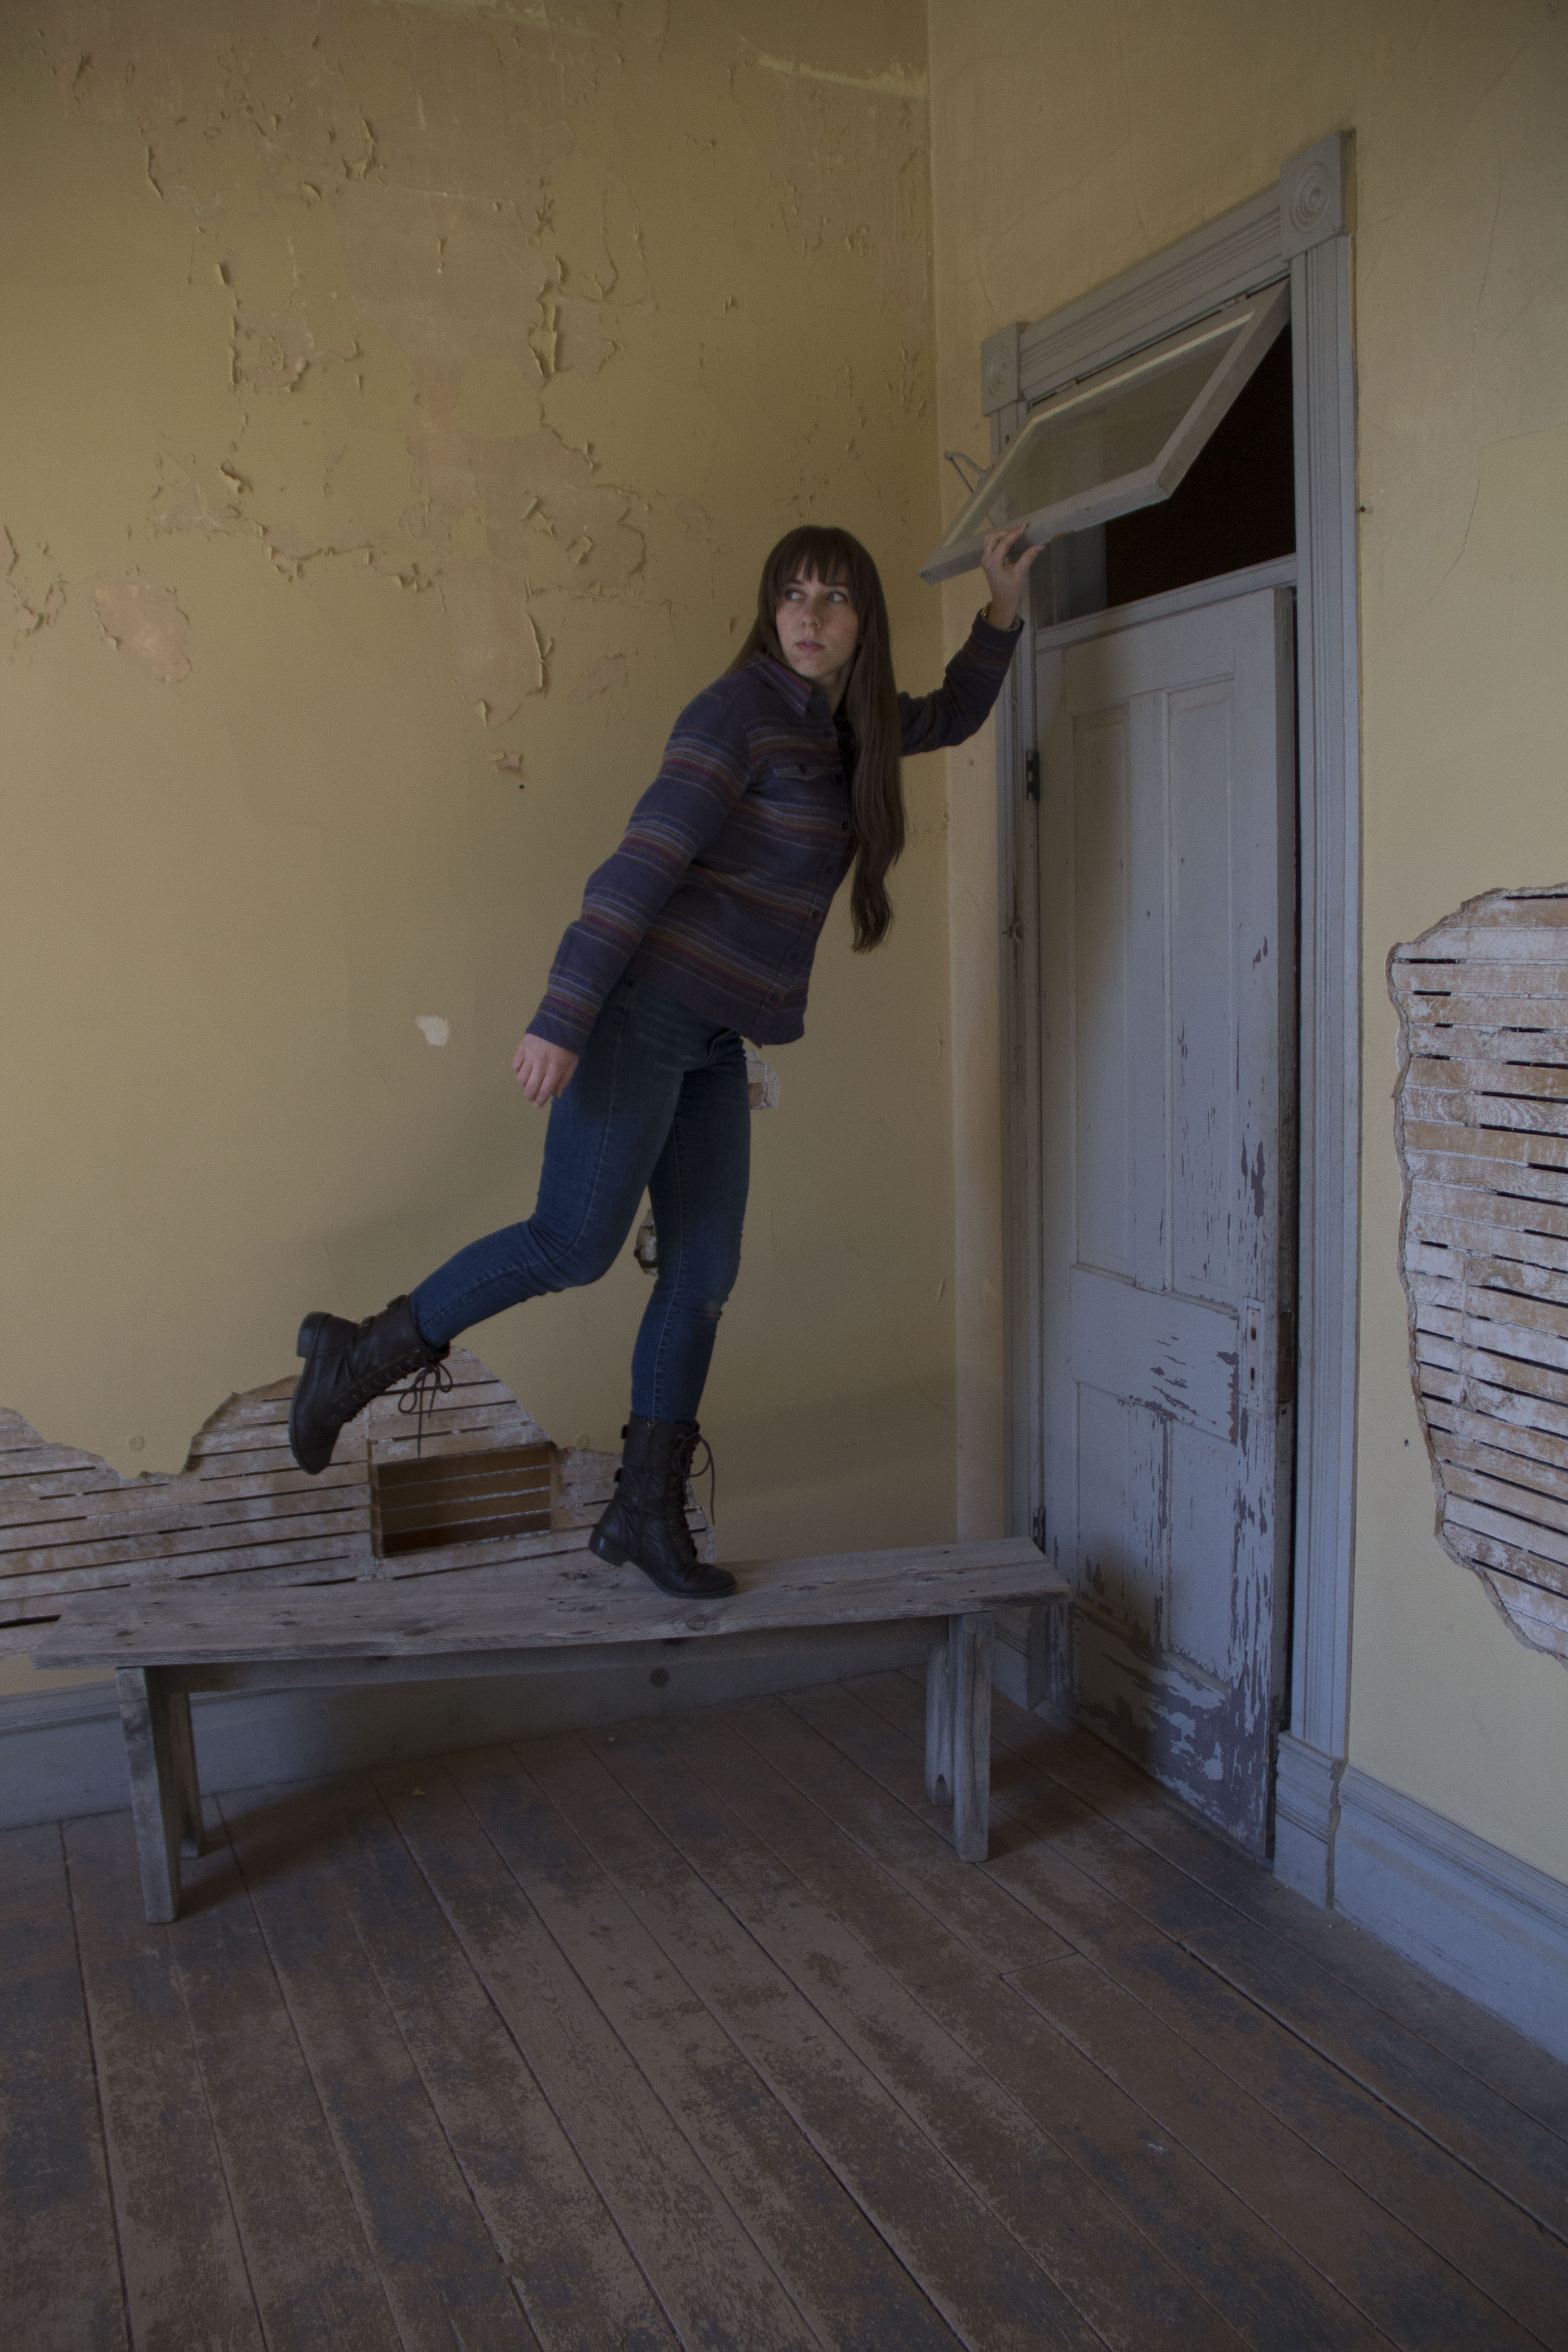
LEVETATION:
This was a really fun, but tricky shot to capture. The hardest part was setting up the tripod and getting the camera settings just right. I had a great model, Cynthia, and she was easy to work with. The post production steps were super fun. I masked out the bench she was standing on to create this effect.


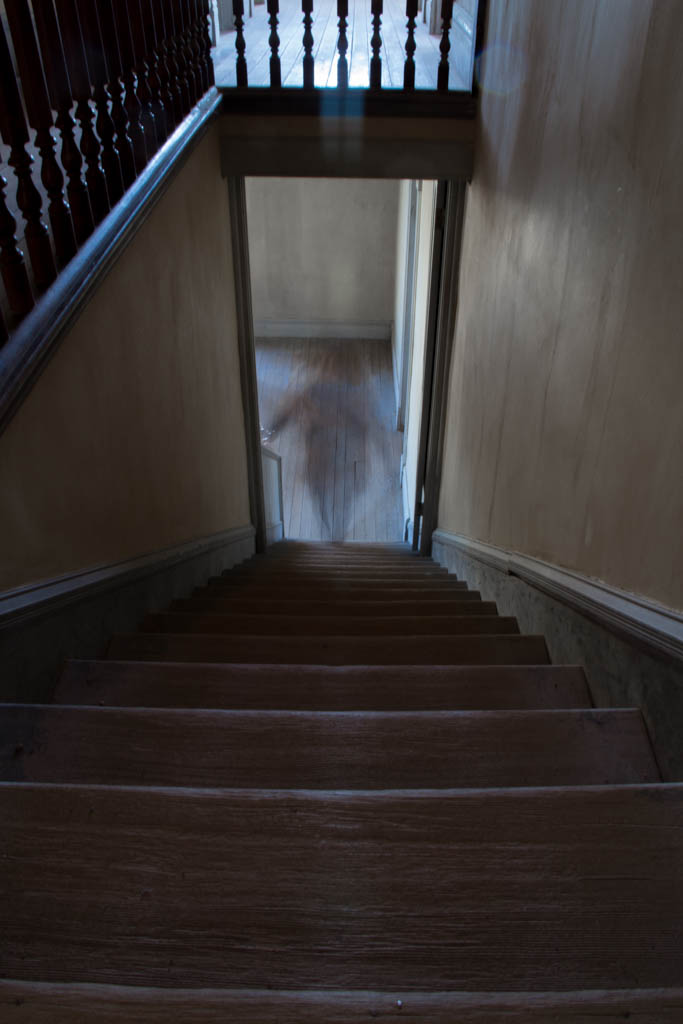
GHOST:
This was another difficult to create, yet rewarding when it turned out, kind of technique. After I got the settings just right and my camera and tripod set up, I had my model walk into the frame half way in the 5.0″ shutter speed.
ABSTRACT:
I used a prime lens to capture this close up of a door hinge. I like how this image turned out because it is hard to tell if it is actually a door hinge or if it is a lock with a key.

CONCEPTUAL:


For my conceptual image, I wanted to use the miniature town that was in one of the rooms of the Hotel Meade. This town was created by a 3rd grade class. The story I wanted to convey with this image was how we can be trapped in a made up world.
COMMERCIAL:
I used the deterioration of the walls of the Hotel Meade to my advantage to create a contrast in old and new for this watch advertisement. The rustic texture of the walls complimented the crisp details of the watch. During post production, I created a logo for the watch and added a tag line to help it feel more like an advertisement.

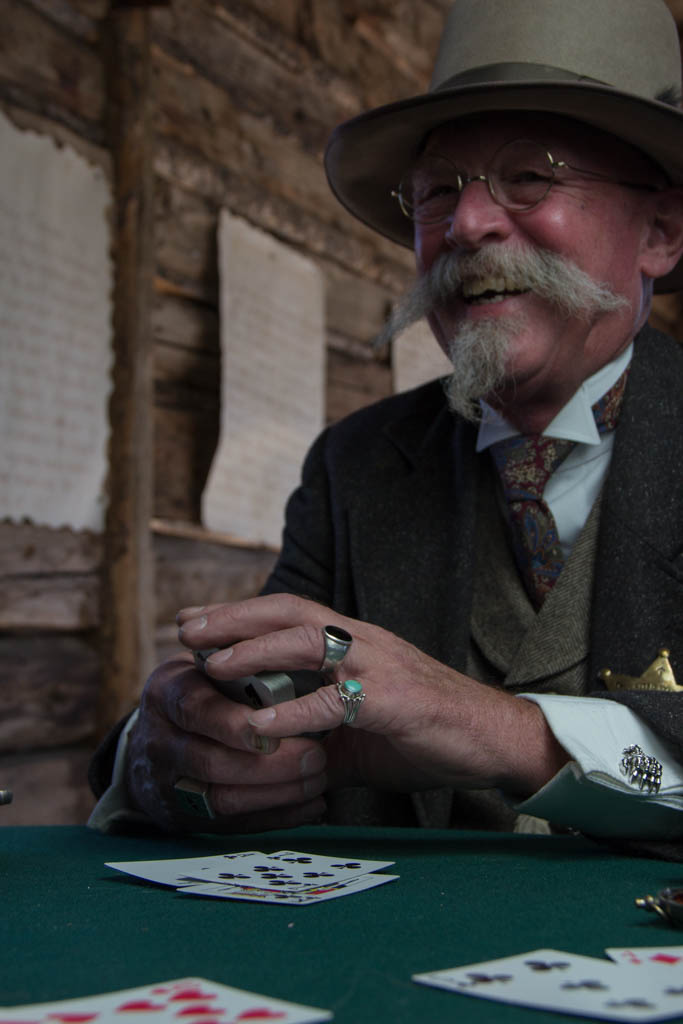
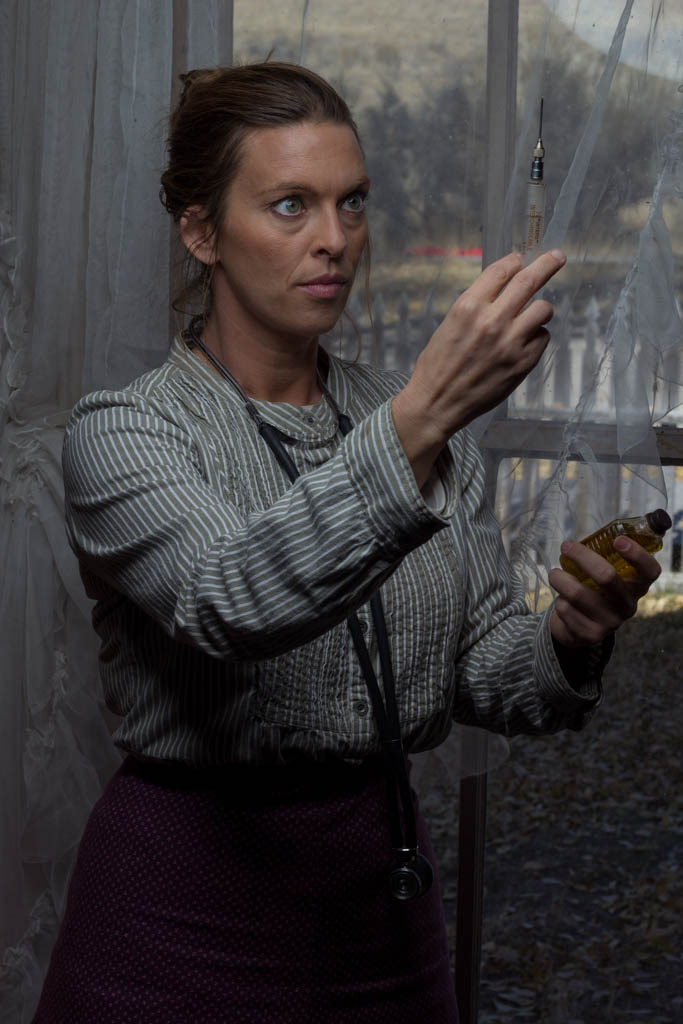
These pictures were taken during the portrait shootout session. My group and I quickly learned we needed to work together as a team in order to capture the pictures we each wanted. As we went from station to station, we were able to be efficient with our time and were all able to learn from each other.


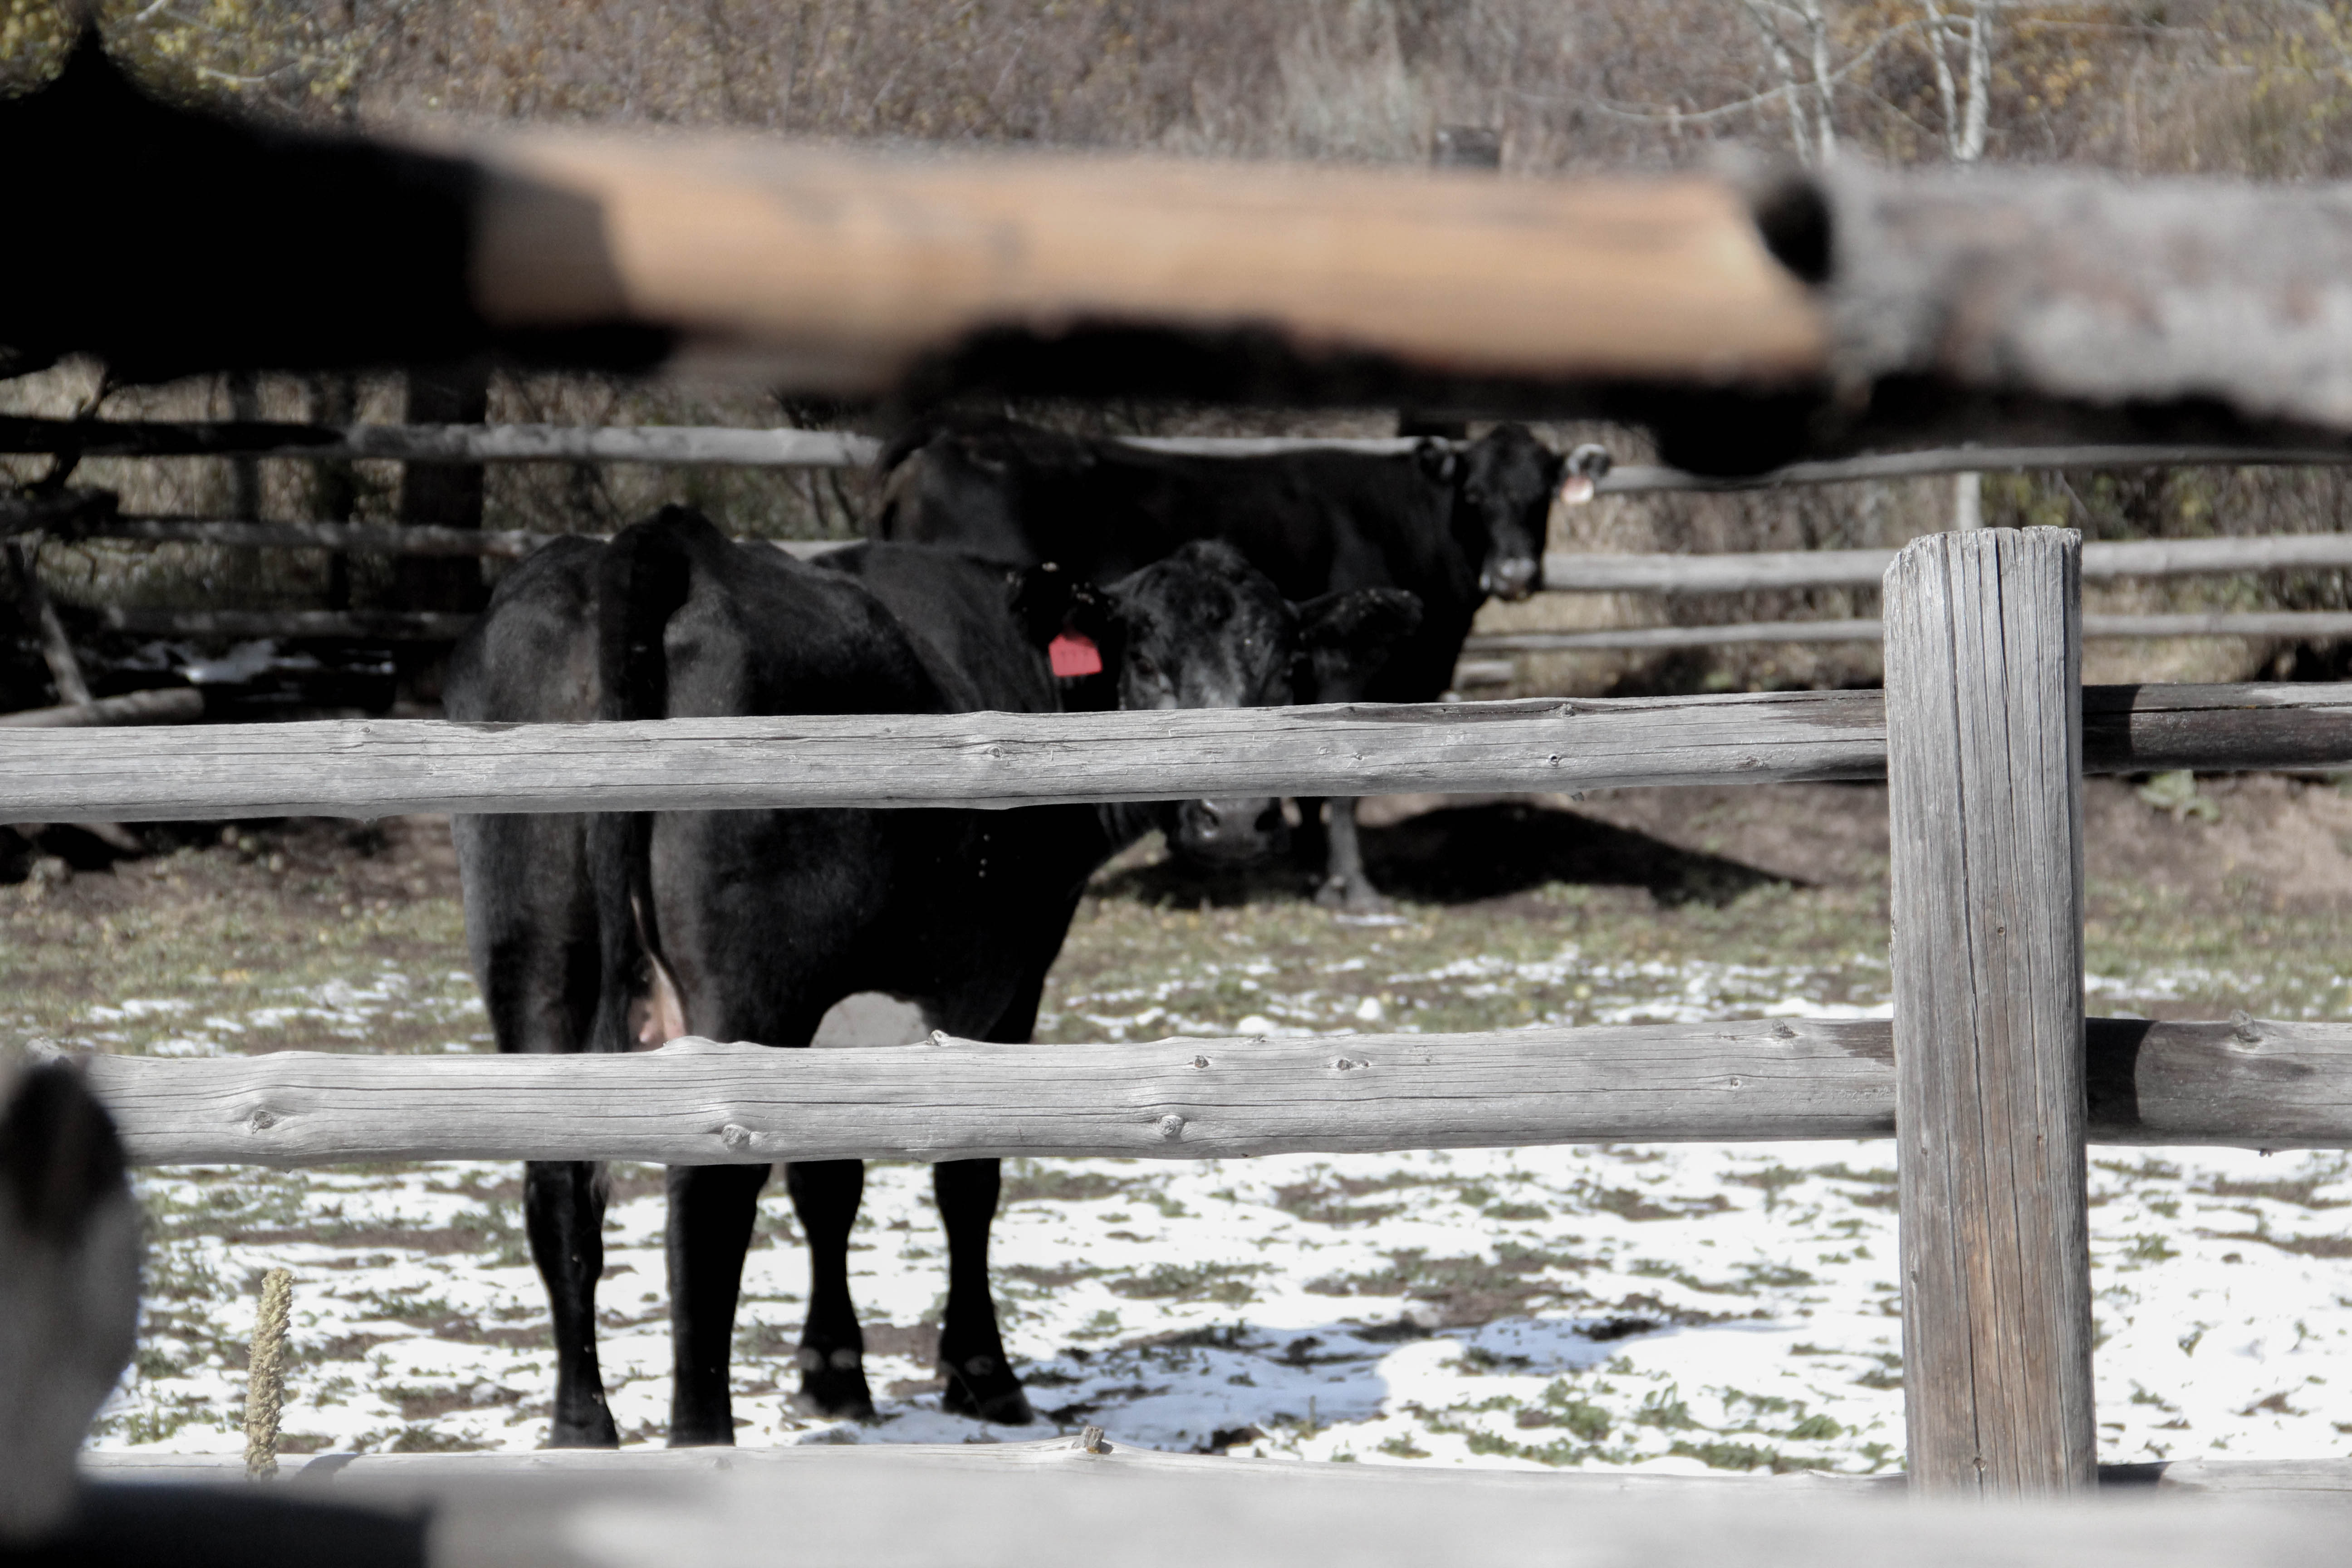
For this assignment, a couple of my friends and I drove up to a lookout about 15 minutes past the temple. When we got to the lookout there wasn’t a whole lot to use for taking pictures. Once we decided it would be better to keep driving down the road, we came to this opening in a field. The opening led to a herd of cattle and some of the snowfall from this weekend. I chose to be closer to the gate that had the cows by them and then shoot my images. I didn’t move around too much, and definitely stayed within the 10 ft boundary.
Here are my images:


Texture:
I added a texture to the beam picture. This is the texture that I chose to add:
 Using this texture, I applied the image to the top layer of the beam photo. From there I changed it’s opacity to 57% and applied the “overlay” option to that layer. After, I masked the back ground of the image, so the texture would only appear on the beam.
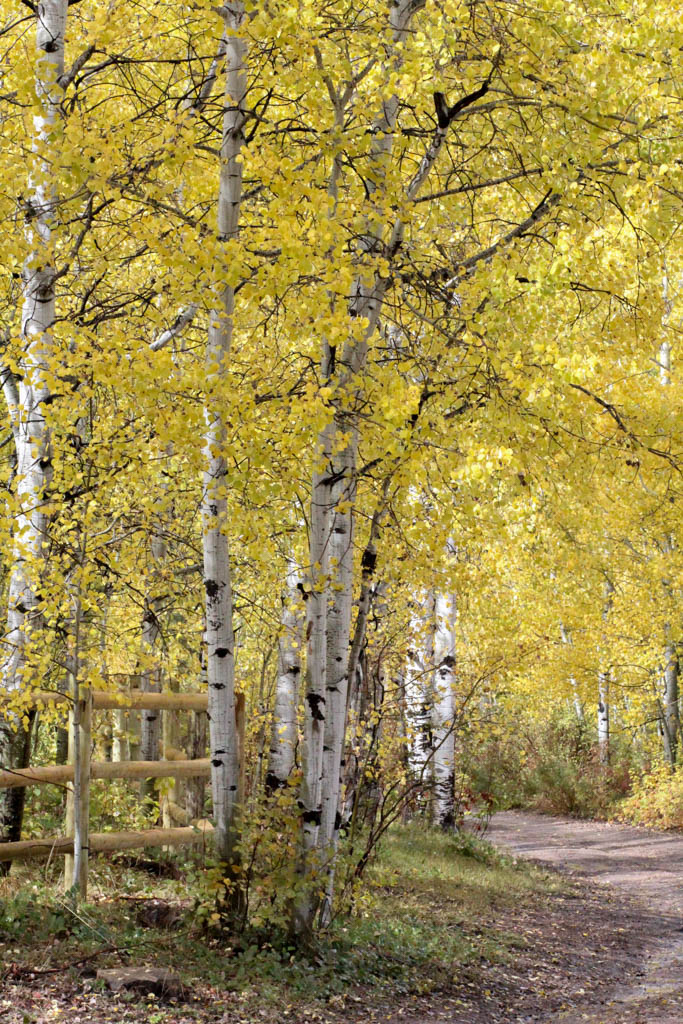
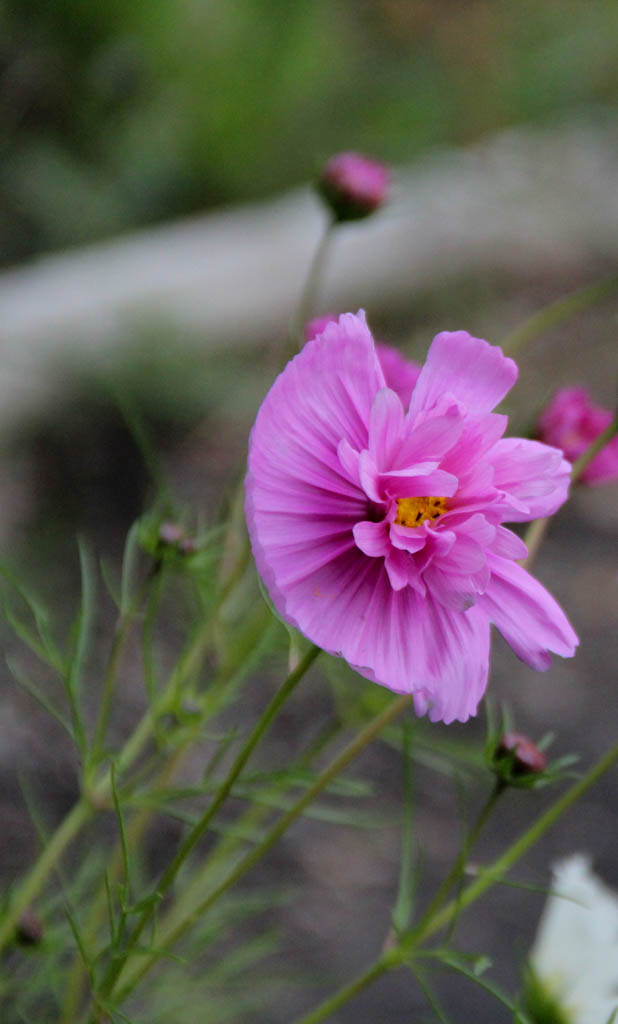
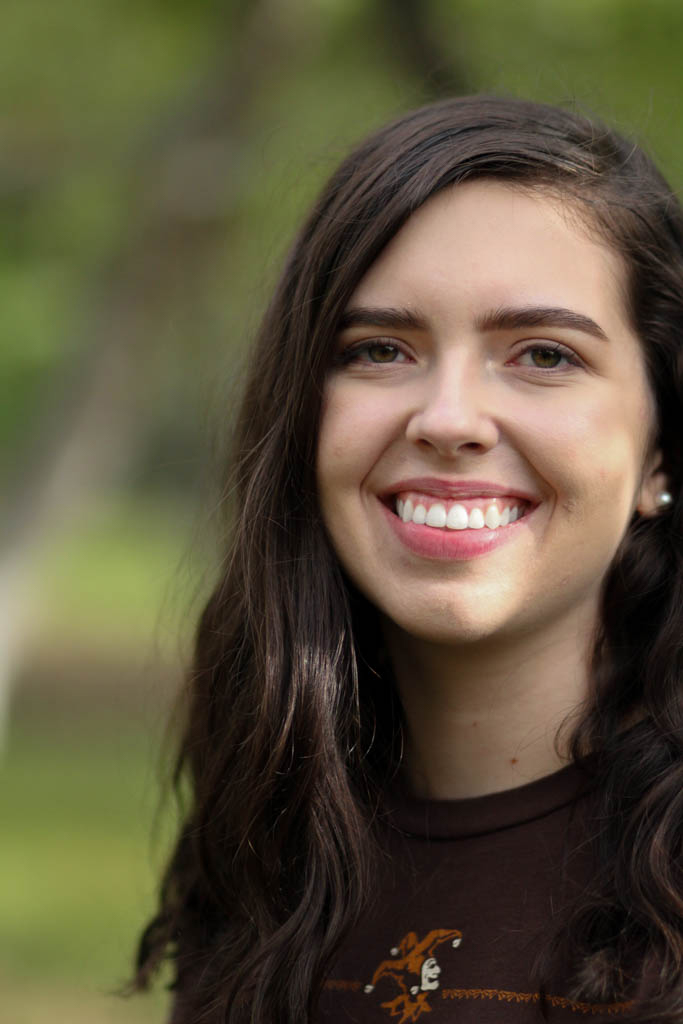
Over the weekend, my roommate and I traveled to Utah to go to General Conference. We stayed with her grandparents up in Oakley, UT, where I was able to get some beautiful deep depth shots of the fall colors that surrounded us. I was also able to rent an 85mm lens with a max aperture value of f 1.8. It was fun to play around with this different lens and I ended up using it to get a variety of shallow depth shots; the portrait was taken with this lens.
DEEP DEPTH:

SHALLOW DEPTH:
Only minimal edits are made to the images, all colors are the original.
As long as I can remember, my summers have been filled with going to campfires and roasting s’mores. When I got invited to attend a friend’s family home evening that was going to be a bonfire at the sand dunes, I knew this would be the perfect spot to take motion freeze and blur pictures. Also, because fires can be unpredictable and move at rapid speeds, I figured it would be a fair challenge to try and capture what I was envisioning.
Sure enough it was quite the challenge. But, after testing and taking nearly 100 photographs, I quickly learned how to capture what I was seeing and envisioning for both freezed and blurred motion.
FREEZE MOTION:


For these pictures I wanted it to be crisp enough to where you could see what was going on. At the same time, I wanted the flames and sparks to be a bit blurred, because that is how fire acts naturally. I played around with the settings for quite a bit, and eventually I was able to get these pictures.
BLUR MOTION:


For these pictures, I took them after I had figured out how to take the fast shutter speed pictures. Once I figured out how to take the fast shutter pictures, essentially all I needed to do was slow the shutter speed down. I tried that a couple times, but I had to adjust the ISO. I am super excited with how these turned out because it was a pretty rocky start.
This weekend I rented a camera from the Communication Department at school. It was fun to mess around with the settings and learn more about how aperture and shutter speed effect the outcome. Although, I will have to admit, these concepts are something I will have to practice multiple times in order for my pictures to turn out the way I envision.
As a reference, and for learning purposes, I will include examples of wide/narrow aperture and fast/slow shutter speed. All pictures are not my own, however they are from unsplash.
WIDE APERTURE:

This picture is a great example of the use of a wide aperture setting. The cat’s head, front arm, and the section of the couch that it is resting on are all in focus, while the rest of the image is blurred. This effect is created when the camera is set to having a wide aperture.
NARROW APERTURE:

This picture is a good example of the use of a narrow aperture setting. Everything in the image is in focus, and no part of the image is blurred. This effect is created when the camera is set to having a narrow aperture.
FAST SHUTTER SPEED:

This picture is a good example of a fast shutter speed. The water is in focus, where the detail of the water droplets is visible. This effect is created when the camera has a fast shutter speed setting.
SLOW SHUTTER SPEED:

This picture is a good example of a slow shutter speed. The light from the steel wool is creating a flared effect. This effect is caused when the camera has a slow shutter speed setting.
Overall, I learned a lot from this learning activity. I didn’t really have a definite idea of what the difference between wide and narrow aperture were, but I am glad I can now associate those terms to visual examples.
PONDER:
I am curious if there is a way to set up a bracketing type method to taking images in wide/normal/narrow apertures? If that is possible, I would like to learn that next!
